Saturday, October 15, 2016

Garage door makeover!


So I saw a few things on pinterest in how to makeover your garage door but all the links were deleted so I had to just look at a few different pictures...  but I will say this was SO CHEAP and what a difference it made!  I got all my items in an amazon order for $27!


I bought this black paint and barely used any in this project.  If you have some laying around the house, even better.  I went with semi gloss to give the "windows" a sheen.


One thing I read said frog tape was a must so I didn't skimp here.  Hard lines are important!
I tried using both of these but the chip brush worked far and away better.  
And this of course is optional, but why not! ha
So this was our garage door before hand.  Not exciting.  I will say we have a side entry so at least you don't have to look at it from the street, but it is oversized so it's just a big white boring door.


So I taped the first square and "estimated" where to put the cross for the window.  Hubs, being a perfectionist decided that if we were going to do this, we needed to do it "right" so he got a measuring tape, and he did the cross part.  (remember this for later)


Once all the windows were taped, I started painting.  It took 2 coats to get it solid black.


I am thankful we read the directions on the frog tape because I was going to wait until it was dry, but NO, you are supposed to peel it off immediately after painting.  And this is why we both got frustrated...  he was trying to be so precise that he never fully stuck down the frog tape in the cross area...  ugh

From far away, it looks GREAT.  Up close...  ehhh.  So now I am planning to get out my white paint and touch up cause there are a few areas worse than this...  AND this is why I hate painting haha

From the street


The next day I got my "hardware in the mail".  I ordered these on amazon for $15.99!  You can see them here.  They are not metal, more of a bendy plastic but you can't tell when looking at them.  The backs have magnets on them, so NO DRILLING!!

They took about 2 seconds to put up and I just can't believe what a difference such a simple project can do to spiffy up our home!


Now to find the time to fix the areas that need touching up...  but overall I am just so happy with this project!  It literally added up to about 30 min of time.

Friday, October 7, 2016

Fall is coming

I have never had a deck before and I'm loving it!


View from the master


My favorite verse


Hubs working on clearing some trees so we can see the view!


Wednesday, September 28, 2016

My sons room

I decided to get a dark color because I have never painted with a dark color.  Now I know why.  Even in super paint, it took 4 coats to get this completely completely solid looking on the wall.  So I used it sparingly lol.

I used it first downstairs above my mantel which required a ladder and after 2 coats I got pretty tired of having to do this.  This was my first lesson and why I used it sparingly.  But oh how I love it!!

I used the other part of it in my son's room.  I love it.  LOVE.  But man, it took like 4 coats!!  We decided to do a pirate theme mainly because of his bathroom.


I was not a fan of the floor in this jack and jill bathroom.  It is an L shape so you walk in from the hallway from my son's room and at the shower it cuts right and connects to the additional bedroom (which I'm using as my office space).
My mother in law suggested a pirate theme which would make the floor work until we were able to change it later and I actually really love it!
I think my favorite is the shower curtain.  I got this from Ikea for $9.99.  Here is a close up.


He loves his room and I love it because at our other homes, his bathroom has always been the guest bathroom too so I have never wanted it to be decorated like a kid's bathroom.  I think this is fun cause it's his space :)


Monday, September 26, 2016

Guest bedroom/bathroom

This was the before of our guest bedroom.  It was cute!
I thought the wall was Kilim beige because I found some extra in the basement.  However, it was not....  it was slightly off after I touched up the room....so I had to paint the entire room!  So now, it's kilim beige lol

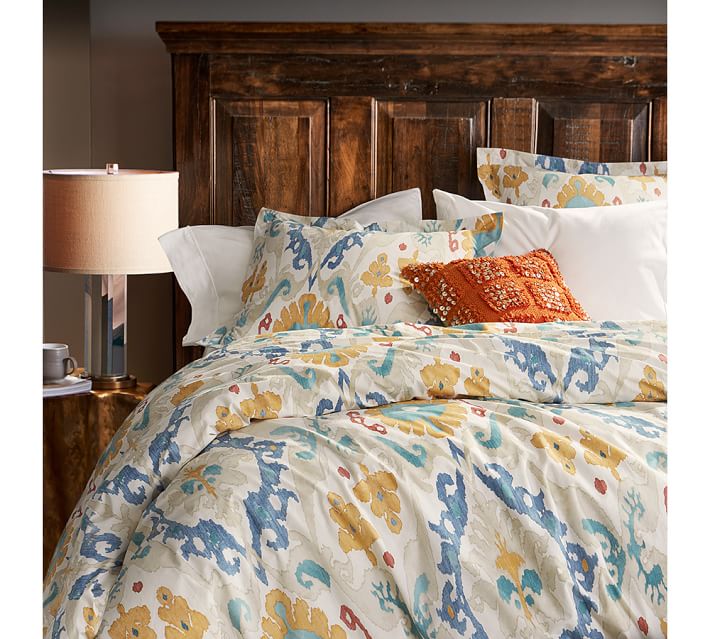
My M-I-L took it upon herself to decorate this room and I don't mind!  She found this beautiful duvet from pottery barn outlet.  It's called Sarina Ikat


The bathroom was a dark chocolate brown.  I painted it Kilim Beige too.


I love having this guest room on the main floor because it's at the opposite end of the house, they have privacy away from us and their own bathroom.  One reason we love this house is because their is really no HOA so they can come park their 5th wheel and stay a little while without anyone fussing!


Thursday, September 22, 2016

Some inside pics of the new house

I am going to share these a room at a time.  I will also try to include the before whenever possible!

So our house was built in mid-2000's.  The style was very traditional I'd say and not me at all.  I never imagined how hard it would be to shop for a house when it was already someone else's.  Building a brand new house makes it a blank slate but seeing past other people's taste proved to be harder!

So as you walk in, it was a goldish mustard yellow.  Not terrible, just not me.

The living room area was a light yellow.  To me, it just was a dirty white that again wasn't me.

The kitchen had cherry cabinets which was totally NOT ME.


But at the end of the day, it has the BEST floor plan. The master is on the main, at one end of the house.  There is a guest with a bathroom at the other end of the main floor.  Then there are two bedrooms upstairs with a bonus.  And we have a 1600 sq ft basement (aka man floor).

Here is my first post of the transformation that was made.  
So I of course love that cooler palate.  I chose Sherwin Williams Lazy gray in their super paint.  That stuff is expensive but it is WORTH IT.  One coat and two 5 gallon buckets did the whole house and we still have a few gallons left.  (Side note.  The house is about 2800 sq ft.  I got a paint quote and it was over $5000!!!  We did it ourselves for about $500.  It did get a little sketchy on that two story foyer but we did it!)


I just love how we can see up there!


Now, back to that kitchen.  Remember the cherry?

I thought for a second it would be fun to paint these myself.  FOR A SECOND.  Then I found a girl on FB that does this for a living.  And I don't regret hiring her for a second.  This is hard work people!


What a difference right??  We also painted the same wall paint on the yellow tile backsplash!

I love it for a million and one reasons but one of the biggest is that I really was not a fan of the granite.  It is tan brown:
With the cherry cabinets, it totally pulled out all the red tones, blah!!  But by painting the cabinets, it really toned that out!

I also spray painted all the hardware oil rubbed bronze.  The cabinet color is BM Swiss Coffee with a gray/brown glaze only in the creases.  The swiss coffee leans a tad more cool than say SW Creamy.  

So far, I am beyond in love with my home.  More pics to come!